Emails have become an important part of our everyday lives,
whether we talk about
staying in touch with our friends or family or about
getting through to our business partners.
Your HUAWEI device features an inbuilt email app which
allows you to access emails from different email clients,
to add multiple email accounts or to easily customize the
accounts settings, according to your needs.
Learn here how to manage your emails in few easy steps.
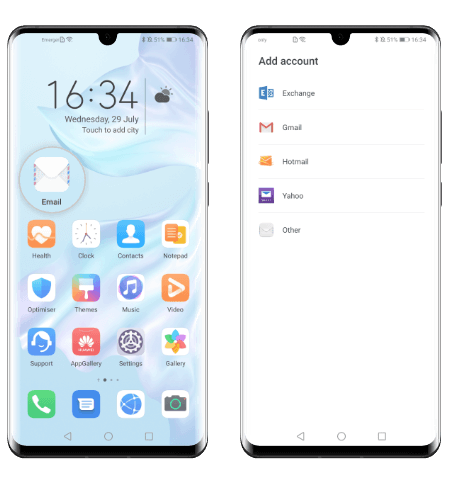
Add an email account
If you want to add an email account on your HUAWEI device,
open the Email app and
select one of the service providers available or
touch Other if your email provider is not on the list.
Then enter your email address and password, tap
Sign in and follow the onscreen instructions to
configure your account.
Now the system will
automatically connect to the server, check the server settings
and set up your email.
Add multiple accounts or Exchange accounts
To add multiple accounts, open
 Email and
go to
Email and
go to
 >Settings. Here
select ADD ACCOUNT,
choose your email service provider and enter your account
information.
Then follow the onscreen instructions to finish setting up
the new email account.
>Settings. Here
select ADD ACCOUNT,
choose your email service provider and enter your account
information.
Then follow the onscreen instructions to finish setting up
the new email account.
You can also add an Exchange account on your
HUAWEI device and log in to your work email. Open
Email, go to
> Settings>
Add account
and select Exchange as the email client. Now
enter your email address, username and password and tap
Sign in. Then follow the onscreen instructions to
configure your work email.
When you have more email accounts set up on your device, you
can easily switch between them. On the Inbox screen of
the email app, touch Inbox and
select the email account you want to view.

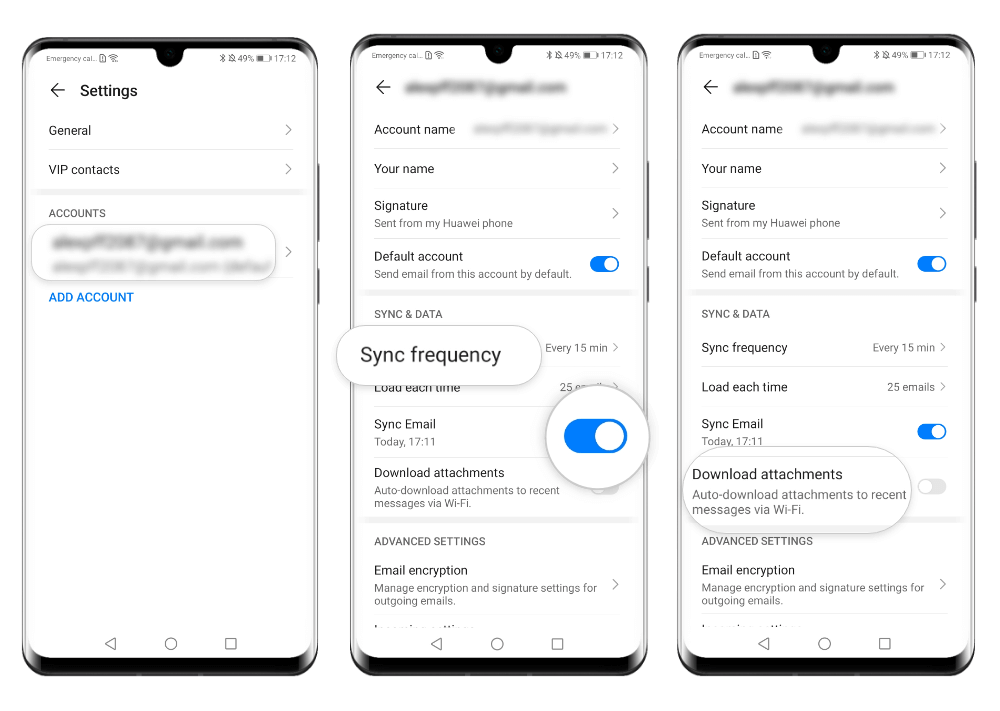
Change account details
If you want to edit the details of one of your email
accounts, open
Email, tap and go
to Settings.
Select the account you want to modify and
change the account name, your name or your signature.
Also, you can set it as the default account by switching on
the toggle.

Delete email accounts
To sign out of an email account, open the
Email app and go to
> Settings.
Select the account you want to delete and press
REMOVE ACCOUNT at the bottom of the screen.
Then tap OK to complete the process.

View your emails
If you want to check your emails, open the
Email app and swipe down on the Inbox screen to
refresh the emails list.
If you have multiple accounts, tap Inbox and
select the account you want to view. Now you can
scroll through your received messages or
press on an email to open it.
Reply, forward or delete the message using
the buttons at the bottom of the screen or
swipe left or right to view the next or the previous email.
If you are notified about an important event in an email,
touch >
Add to calendar to import the event into your calendar.

Sync your emails
You can
set your device to automatically synchronise your email
accounts
with the service provider servers.
To activate this function, open
Email and
go to >
Settings.
Select the account you wish to sync emails for and
enable Sync email. You can also
set the sync frequency, the number of emails loaded each time
or you can choose to
download emails attachments automatically via Wi-Fi.
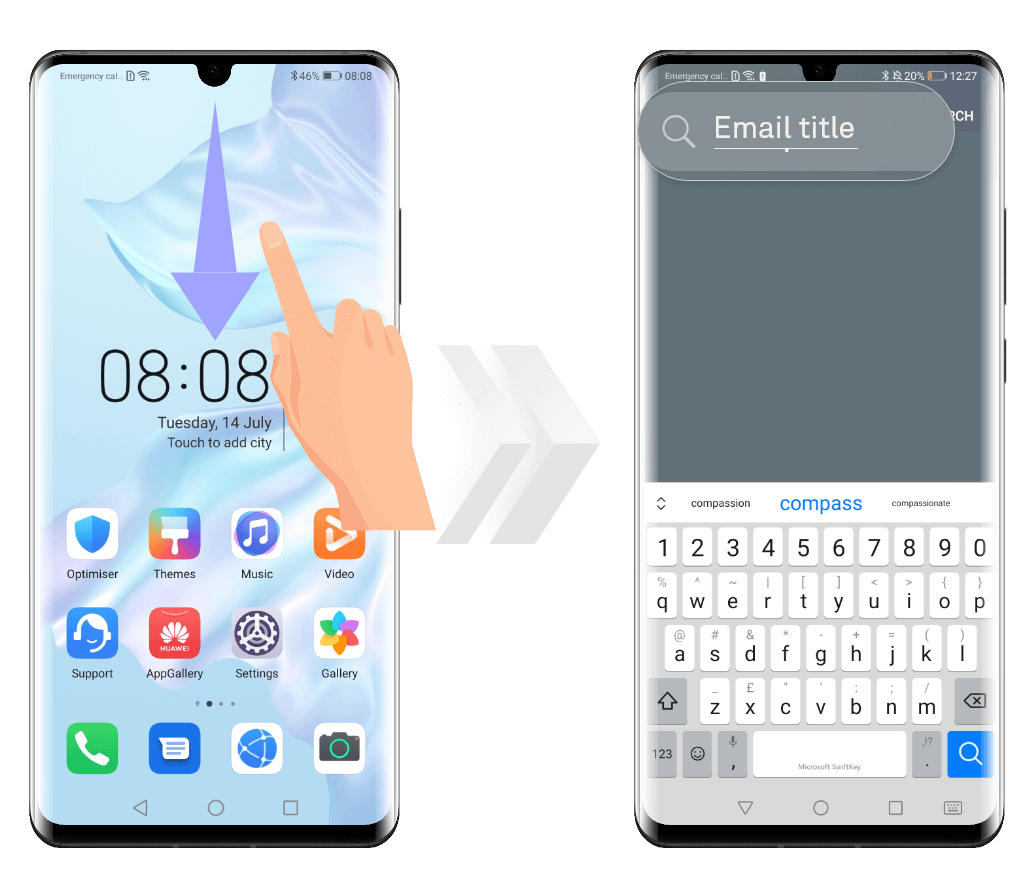
Search and organize emails
If you want to quickly find an email, use one of the
following methods:
- on the Inbox screen, tap on the search box and
enter one or more keywords (for example an email title, an
attachment filename or the name of the sender). The matches will be
displayed bellow.
- swipe down from the middle of the home screen to open the
search bar. Enter one or more keywords, such as an email
title, an attachment filename or an email address, and all
the corresponding matches will be displayed bellow.
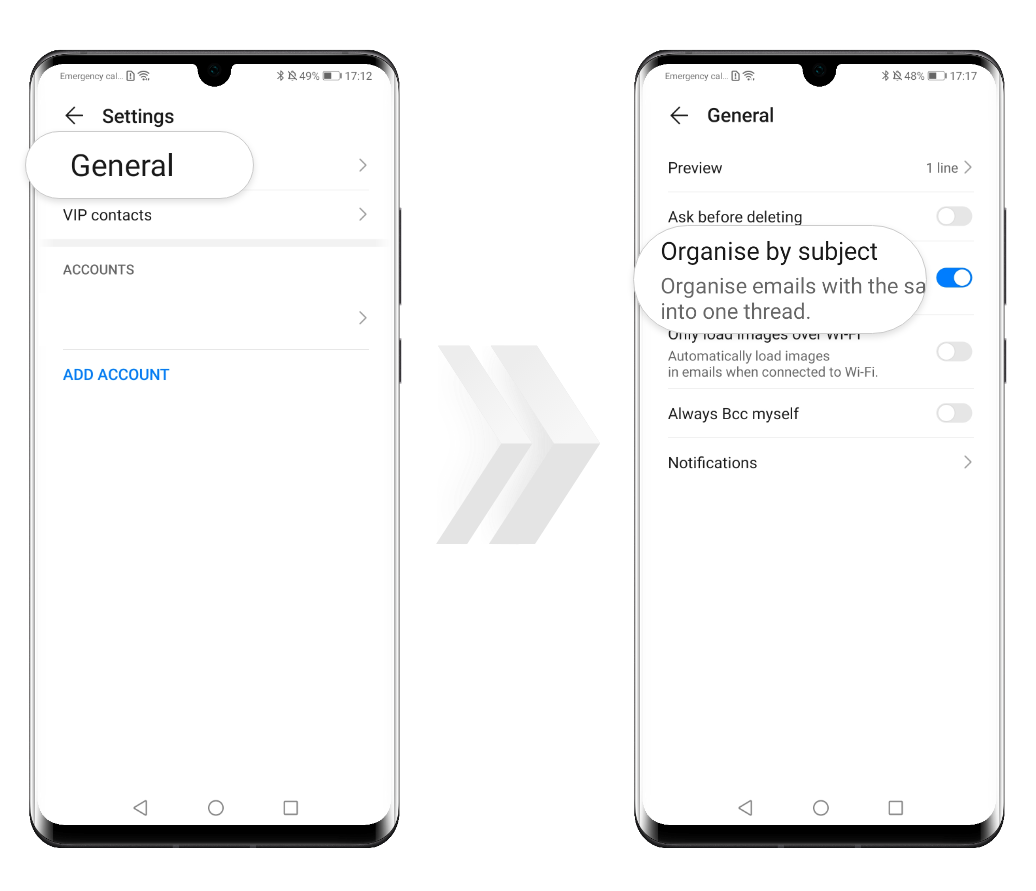
You can also organize your emails based on their subject. On the Inbox screen, go to
> Settings>
General and enable Organize by subject. Now all the
emails with the same subject will be
arranged into one thread.

Delete emails
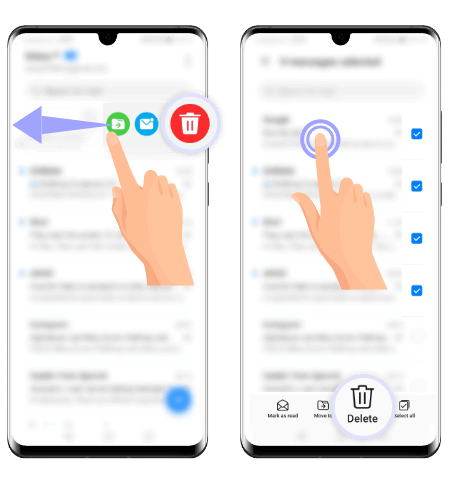
To delete an email, open the Email app and
swipe left on the message you want to remove, than
tap  .
.
If you want to
delete several emails at once, touch and hold on a message to
be removed, select all the emails you want to get rid of and
tap  .
.
Manage VIP contacts
You don't want to miss any email from your business partners? Add
their contact details to the VIP list and your device will
automatically copy the emails received from them to the
VIP mailbox.
You can add VIP contacts using one of the following
methods:
- open the Email app and tap
> Settings>
VIP contacts. On the VIP list screen, touch ADD and
either create a new contact or add one from the
contacts list. Then follow the onscreen instructions to
complete the process.
- open an
email, tap on the name of the sender or of the receiver and
then select Add to VIP list.


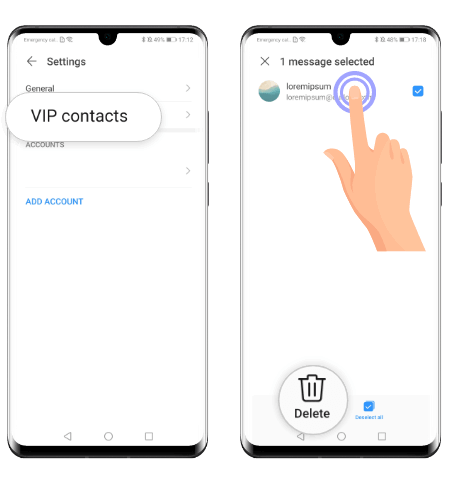
Remove VIP contacts
If you want to remove someone from the VIP list, open the
Email app and go to
>Settings>
VIP contacts.
Here select the entry you want to delete and touch
.
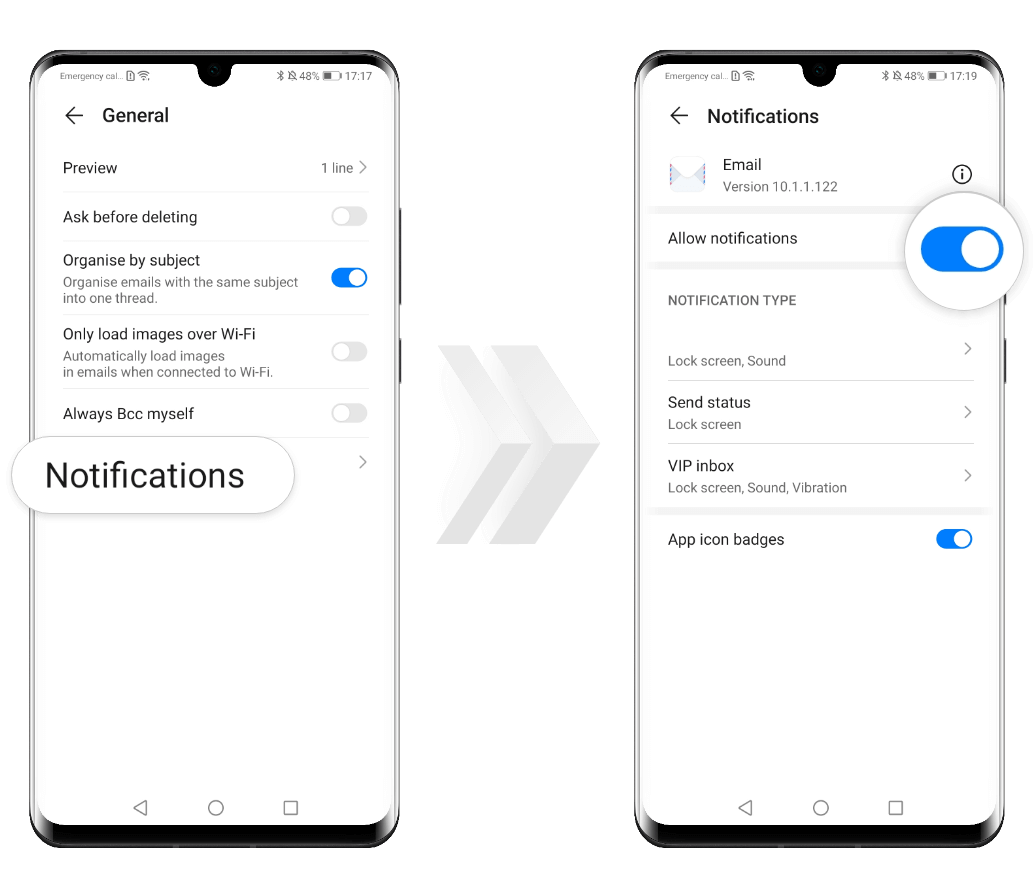
Set email notifications
If you want
to be notified each time you receive an email, enable email
notifications
and customize them according to your preferences. Open
 Email and
go to >
Settings > General> Notifications. Here enable
Allow notifications.
Email and
go to >
Settings > General> Notifications. Here enable
Allow notifications.
If you have
multiple email accounts, select the one you want to set
notifications
for and turn on Allow notifications.
You can then
select a notification mode, choose a notification sound, activate
vibrations
or allow notifications to be displayed on the lock screen.